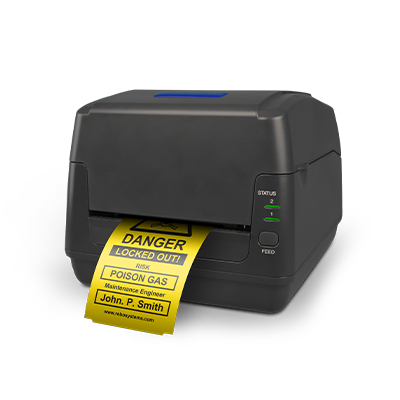
Getting started with your
SMS TAG-ID2
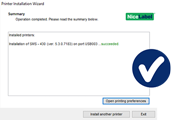
Here is the USB installation of the printer driver.
Do you want to set up the printer afterwards for use via a LAN connection? Then watch the relevant instruction video (Step 6 | Instructional videos).
1
Get your printer ready but do not switch it on and do not connect it to your computer yet.
2
Download the SMS printer driver and start the SMS-Printer-Drivers.exe file
(Downloading error? Right-click and select “Save as”)
2
Download the SMS printer driver and unpack the SMS-Printer-Drivers-2024.zip file and start the PrnInst.exe installation file
(Make sure to install the .exe installation file with administrator rights)


The wizard will recognise your SMS printer and after this, the printer driver will be installed automatically!
(Failed to install? Contact support@rebo.nl or call +31 (0)35 – 2400 137)
Here is the USB installation of the printer driver.
Do you want to set up the printer afterwards for use via a LAN connection? Then watch the relevant instruction video (Step 6 | Instructional videos).
1
Get your printer ready but do not switch it on and do not connect it to your computer yet.
2
Download the SMS printer driver and start the SMS-Printer-Drivers.exe file
(Downloading error? Right-click and select “Save as”)
2
Download the SMS printer driver and unpack the SMS-Printer-Drivers-2024.zip file and start the PrnInst.exe installation file
(Make sure to install the .exe installation file with administrator rights)


The wizard will recognise your SMS printer and after this, the printer driver will be installed automatically!
(Failed to install? Contact support@rebo.nl or call +31 (0)35 – 2400 137)

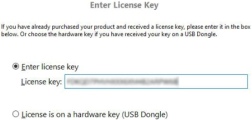
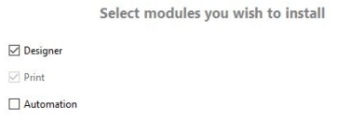
Install the NiceLabel software so you can design and print labels.
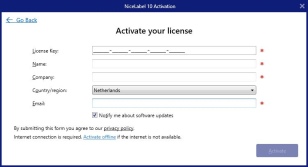
Tip: Keep your NiceLabel licence code in reach.
1
Download your software version below and start the installer.
NiceLabel 10
NiceLabel 2019
(Error while downloading? Right-click and select “Save as”)

5
Choose the location where you want to install NiceLabel and click Next

6
The software will now be installed. When the installation is complete, launch the application NiceLabel Designer by clicking the shortcut on your desktop..

NiceLabel is now ready for use.
(Unsuccessful? Please contact support@rebo.nl or call +31 (0)35 – 6016941)
Install the NiceLabel software so you can design and print labels.
Tip: Keep your NiceLabel licence code in reach.
1
Download your software version below and start the installer.
NiceLabel 10
NiceLabel 2019
(Error while downloading? Right-click and select “Save as”)

5
Choose the location where you want to install NiceLabel and click Next

6
The software will now be installed. When the installation is complete, launch the application NiceLabel Designer by clicking the shortcut on your desktop..

NiceLabel is now ready for use.
(Unsuccessful? Please contact support@rebo.nl or call +31 (0)35 – 6016941)
The utilities below are required or recommended when using NiceLabel label software to make it even easier for you to design and print your labels.
1
SVG Explorer
Windows Explorer plug-in for previewing SVG images.
2
Graphic Symbols Library V4
Exclusive to our customers: thousands of industrial & technical symbols, official seals and logos in high quality.
Do you not see an example of these symbols? In your Windows Explorer, click the
Right click
>
View
>
Normal icons
or
Large icons
Old clipart (WMF)
Looking for old symbols that were in our previous version(s) of clipart? You can download them below. Note: These do not meet the latest ISO standards.
Do you not see an example of these symbols? Download and install
this free tool
. After this, in your Windows Explorer, click the
Right click
>
View
>
Normal icons
or
Large icons
3
Microsoft Database Engine
Required to associate NiceLabel with a Microsoft Excel or Access file.
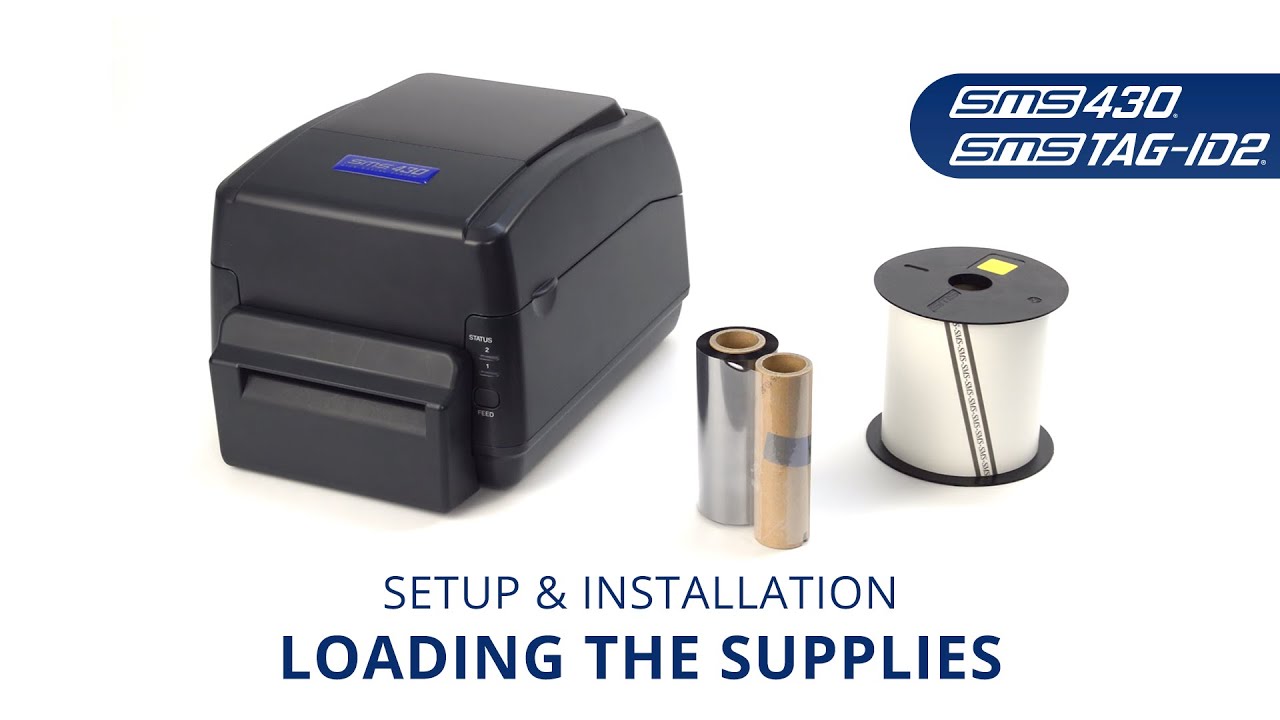
The steps below describe how the materials are placed.
The steps below describe how the materials are placed.
Watch instructional video
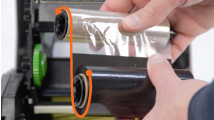
Watch in this instruction video how to place the label material and print ribbon.
(Do you still have questions after viewing? Please contact our support department)
Watch instructional video
Watch in this instruction video how to place the label material and print ribbon.
(Do you still have questions after viewing? Please contact our support department)
Positioning the sensor
Because your printer has to calibrate to the material, it is important that the sensor is in the right position.
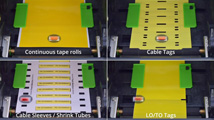
• Are you using a roll of continuous tape or a roll of labels with spaces or black stripes on the back? Then place the sensor in the centre.
• Are you using a roll of special labels with cutouts such as Tags, Shrink Tubes, Cable Tags, etc.? Please place the sensor exactly below the cutout.
The steps below describe how the materials are placed.
The steps below describe how the materials are placed.
Watch instructional video
Watch in this instruction video how to place the label material and print ribbon.
(Do you still have questions after viewing? Please contact our support department)
Watch instructional video
Watch in this instruction video how to place the label material and print ribbon.
(Do you still have questions after viewing? Please contact our support department)
Positioning the sensor
Because your printer has to calibrate to the material, it is important that the sensor is in the right position.
• Are you using a roll of continuous tape or a roll of labels with spaces or black stripes on the back? Then place the sensor in the centre.
• Are you using a roll of special labels with cutouts such as Tags, Shrink Tubes, Cable Tags, etc.? Please place the sensor exactly below the cutout.
NiceLabel settings
Perform the following steps:
1
Open NiceLabel Designer and goto File>Options

2
Click on tab Designer
3
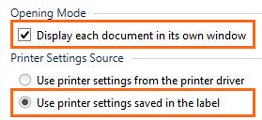
At Opening modus selection option Display each document in its own window.
At Source printer settings selectoption Printer settings saved in the label .
4
ClickOK to save the changes
Material-specific printer settings
In most cases, the printer’s default settings are sufficient and you do not need to change anything.
Should it be necessary, you can adjust these settings as required.
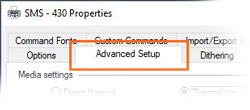
Open the printer driver settings to change e.g. cutter/tear strip, heat, speed, sensor choice for material type (media type):
1
Open or create a label and click on the printer icon


Roll of die-cut labels with gaps
For rolls of labels without marks/stripes on the back Media type must be set to“Label with gaps”


Roll with marks/stripes or cut-outs
Are you using material with cut-outs or marks/stripes on the back side? Select Media type “Label with marks”

NiceLabel settings
Perform the following steps:
1
Open NiceLabel Designer and goto File>Options

2
Click on tab Designer
3
At Opening modus selection option Display each document in its own window.
At Source printer settings selectoption Printer settings saved in the label .

4
ClickOK to save the changes
Material-specific printer settings
In most cases, the printer’s default settings are sufficient and you do not need to change anything.
Should it be necessary, you can adjust these settings as required.
Open the printer driver settings to change e.g. cutter/tear strip, heat, speed, sensor choice for material type (media type):
1
Open or create a label and click on the printer icon


Roll of die-cut labels with gaps
For rolls of labels without marks/stripes on the back Media type must be set to“Label with gaps”


Roll with marks/stripes or cut-outs
Are you using material with cut-outs or marks/stripes on the back side? Select Media type “Label with marks”

Watch the instructional videos to get familiar with your printer and software.
Do you have questions that are not being answered here? Contact our support department.
Watch the instructional videos to get familiar with your printer and software.
Do you have questions that are not being answered here? Contact our support department.
Feel free to use extra downloadslike the user manualand various handy tools.
SMS TAG-ID2 manual
InkScape design software
NiceLabel Label Converter
SMS Printer Tool
Rebo B.V. Warranty document
Feel free to use extra downloadslike the user manualand various handy tools.


